Phase Team
Published on
February 16, 2026
Phase has been built to last and accompany you along your DJ journey. But there are always little things that can help you take care of your Phase, and ensure it will serve you for years to come! In this article, we’re going to share some little tips on how to do so, the best practices, and more.
Let’s go! 👇
The battery of your Phase doesn’t come fully charged out of the box, to comply with the standards in force (especially air transport). Therefore, it’s important to charge it first. It only takes 2 hours for the full charge, and then you can enjoy it to the fullest!

Charge your unit at least every 6 months, to keep the batteries healthy.
We’re constantly releasing firmware updates to keep improving the experience with Phase. This will guarantee the best possible performance of your product. Once a new update is out, you will receive a notification directly to your Phase Manager. Otherwise, you can also subscribe to our newsletter to receive the news directly in your inbox!
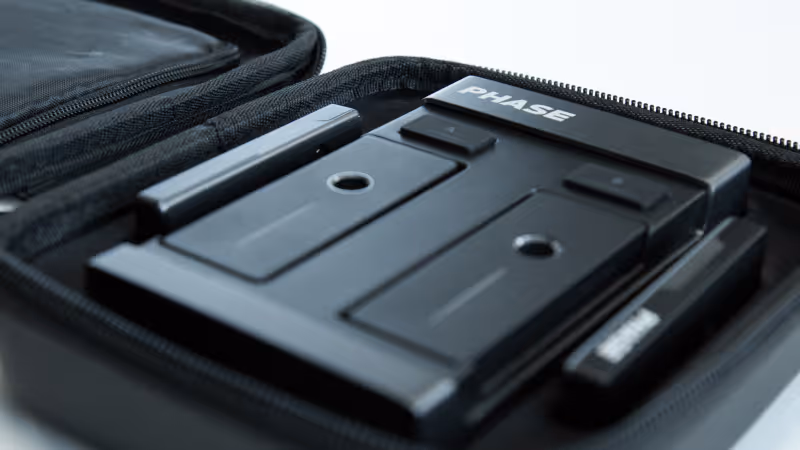
The best way to protect your Phase on your tour is to use the Phase Case anywhere you go. This will make sure you won't see any scratches on your unit anytime soon. 😉
Because our awesome team of product specialists will take care of everything you might encounter! Replying in less than 24h on Mondays-Fridays, Max and Lowell will answer any of your burning requests, so your Phase is up and running.
Don't hesitate to reach out if anything! We hope this article served you well, and that you have learned a little thing or two about how to take care of your Phase.
If you have any additional questions, don’t hesitate to check out our Help Center or reach out to our product specialists directly!
Be notified when new content is out! Subscribe to our newsletter to receive exclusive content straight into your inbox.


Lorem ipsum dolor sit amet, consectetur adipiscing elit. Suspendisse varius enim in eros elementum tristique. Duis cursus, mi quis viverra ornare, eros dolor interdum nulla, ut commodo diam libero vitae erat. Aenean faucibus nibh et justo cursus id rutrum lorem imperdiet. Nunc ut sem vitae risus tristique posuere.